Get Started with Storyboard Updates
In this tutorial, you will learn the basics about creating and dynamically updating a storyboard-based application with Bounces.
Create and run the application
Bounces Project Templates enable the creation of a complete dynamic application project with a single command. In this tutorial you will use a tab-based iOS app template as a starting point.
Select New Project from Template… in the File menu.
Select the Tabbed App template in the iOS Applications section in the left column, set the Product Name field in the right pane to "LiveTabs", and leave other fields with their default values.
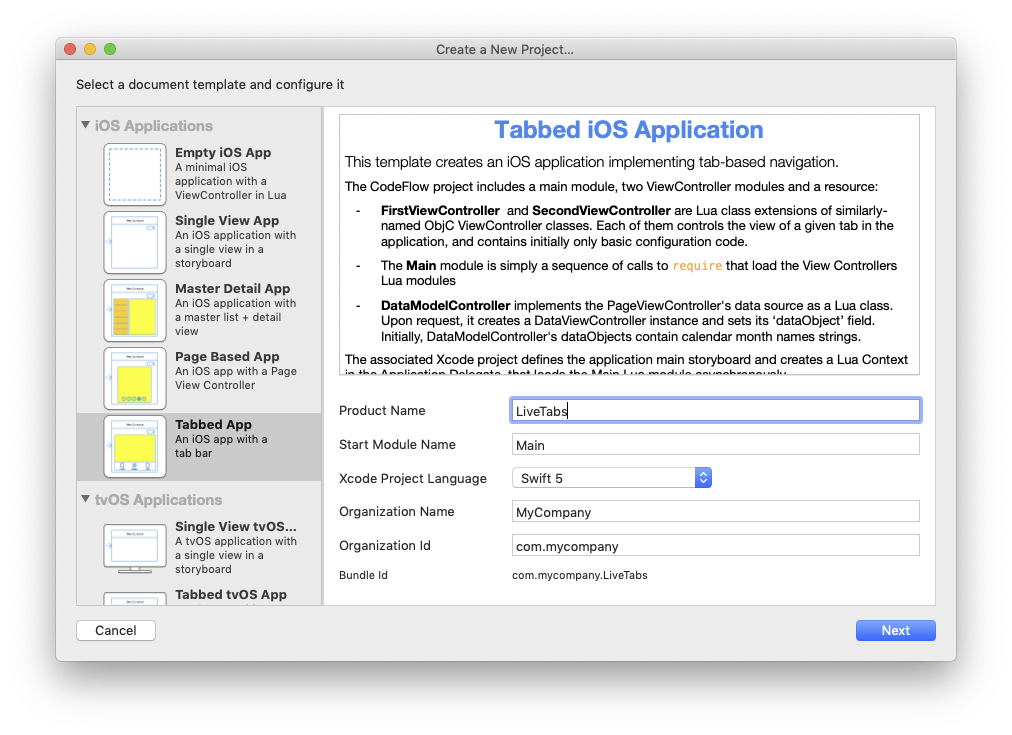
Click on the Next button and select a parent directory for the created project. A LiveTabs Bounces project window appears on the screen.
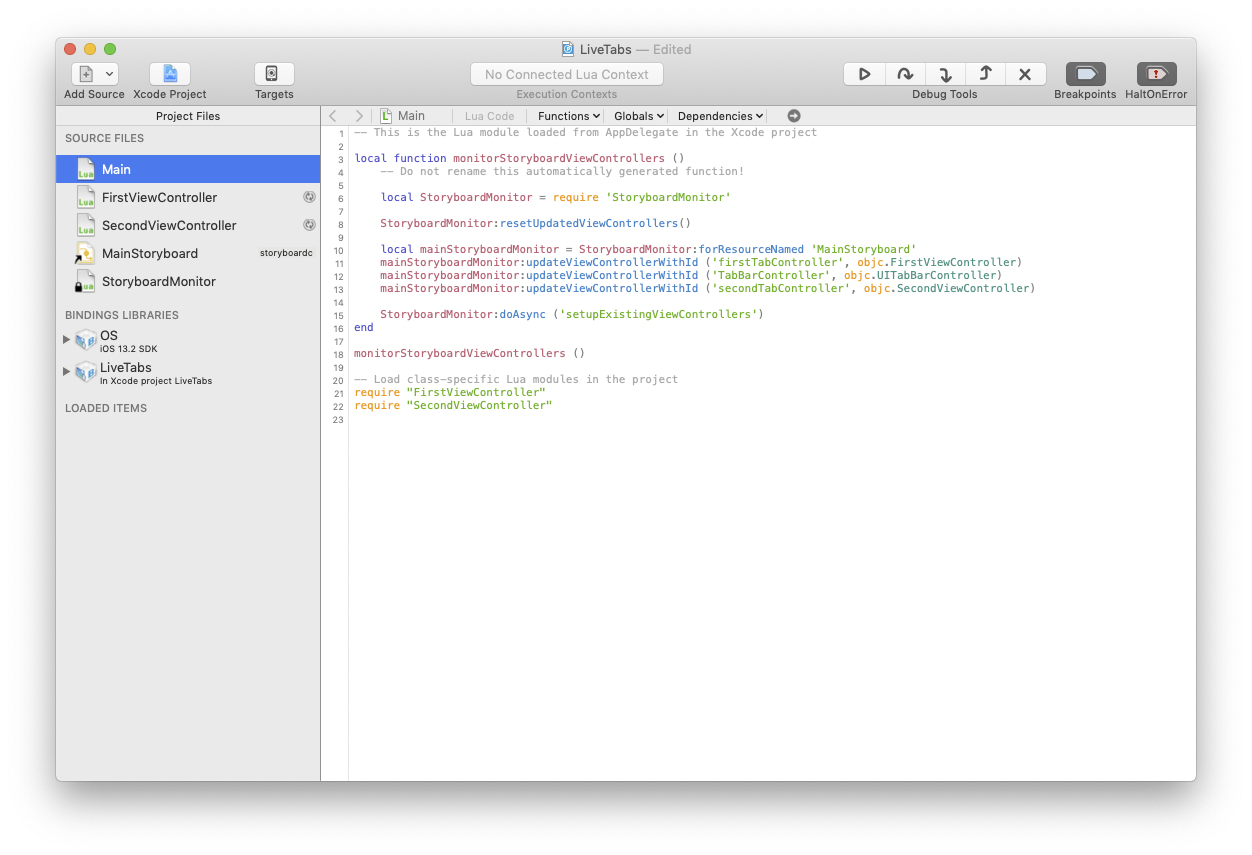
You can ignore the code in the LiveTabs project, as this project will be used in this tutorial only for triggering dynamic storyboard update in the target application.
However, notice the MainStoryboard file reference in the project files list: this file reference is a link to the Main storyboard in the associated Xcode project, and this link is needed for enabling dynamic storyboard updates by Bounces.
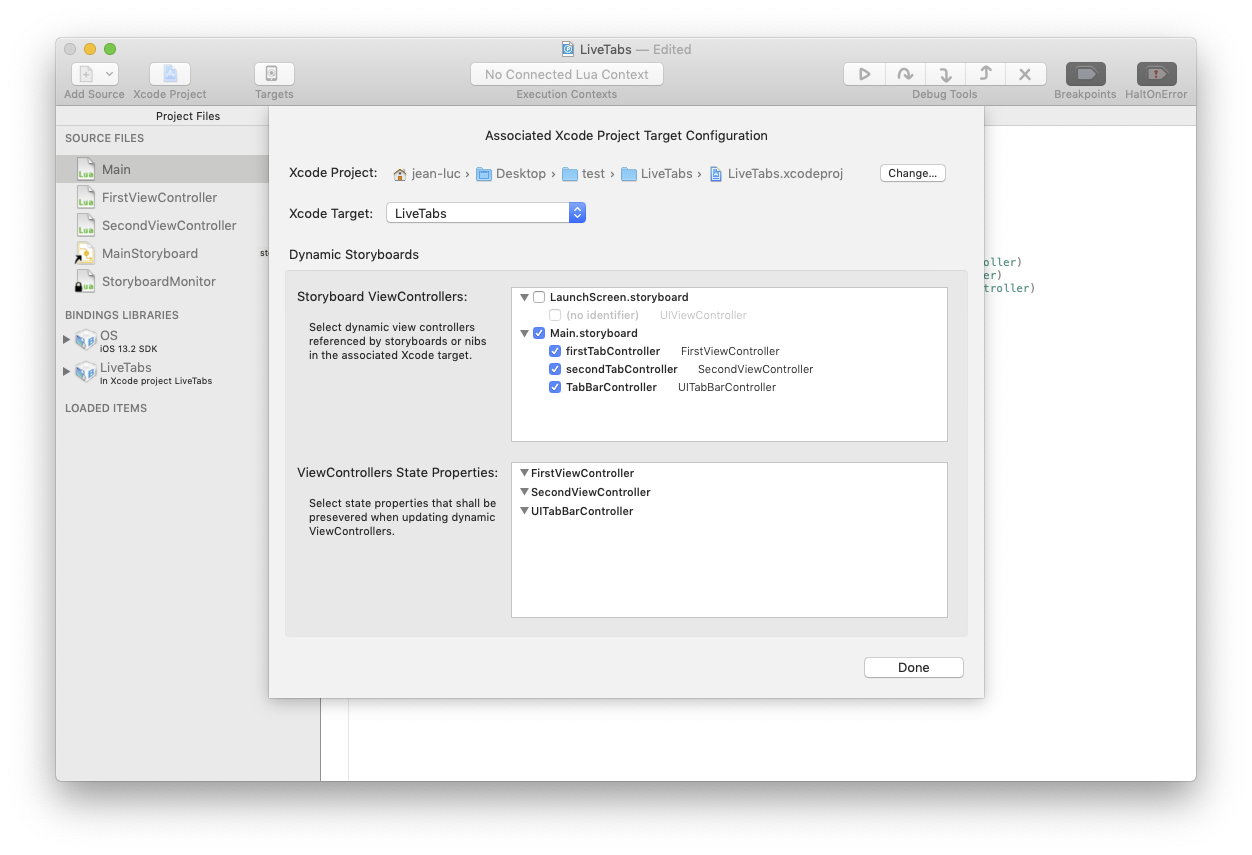
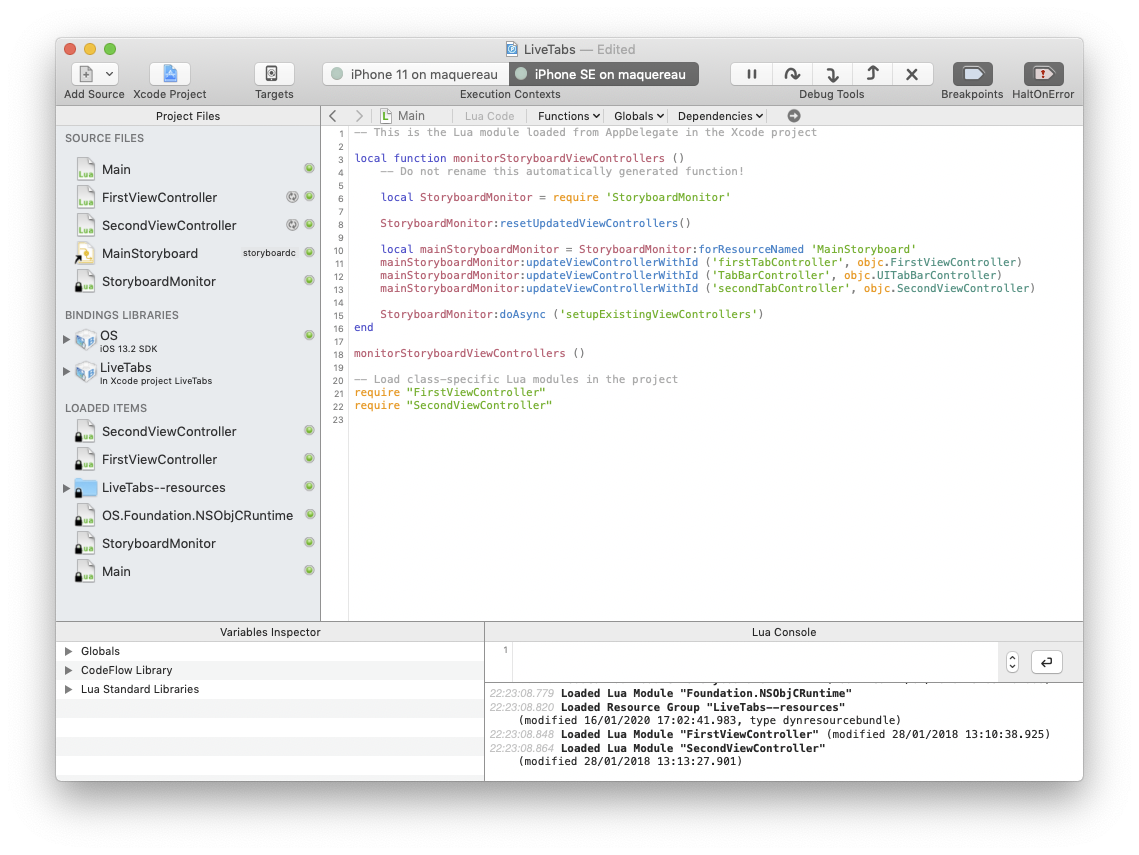
If you click on the Xcode Project button in the toolbar, you can see that all three ViewControllers defined in the Main storyboard are already configured for dynamic update:
Open the associated HelloWorld Xcode project from Bounces by selecting Open Xcode Project in the Program menu, or by pressing
cmd shift O.In Xcode, select a target device or simulator, and run the application.
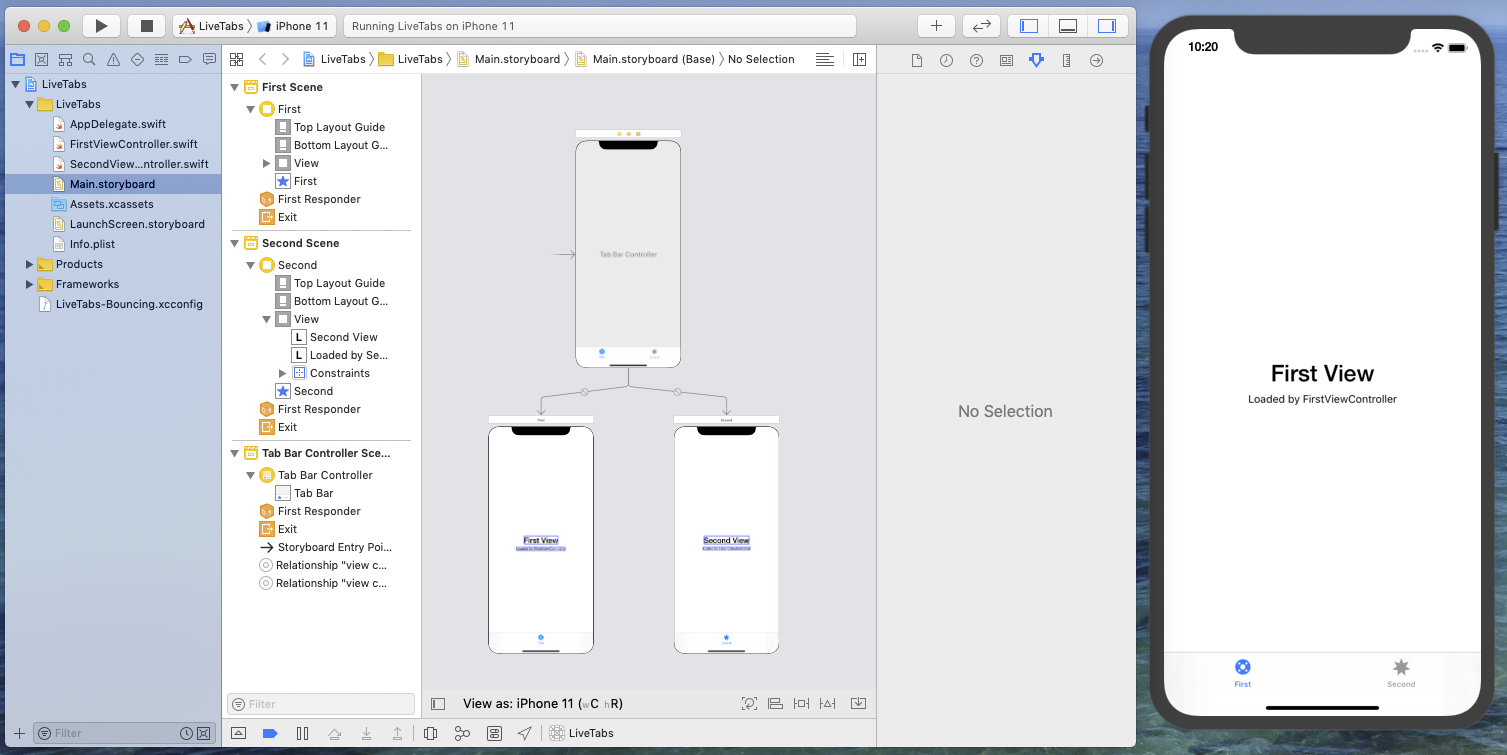
You can see that the LiveTabs project window in Bounces has changed:
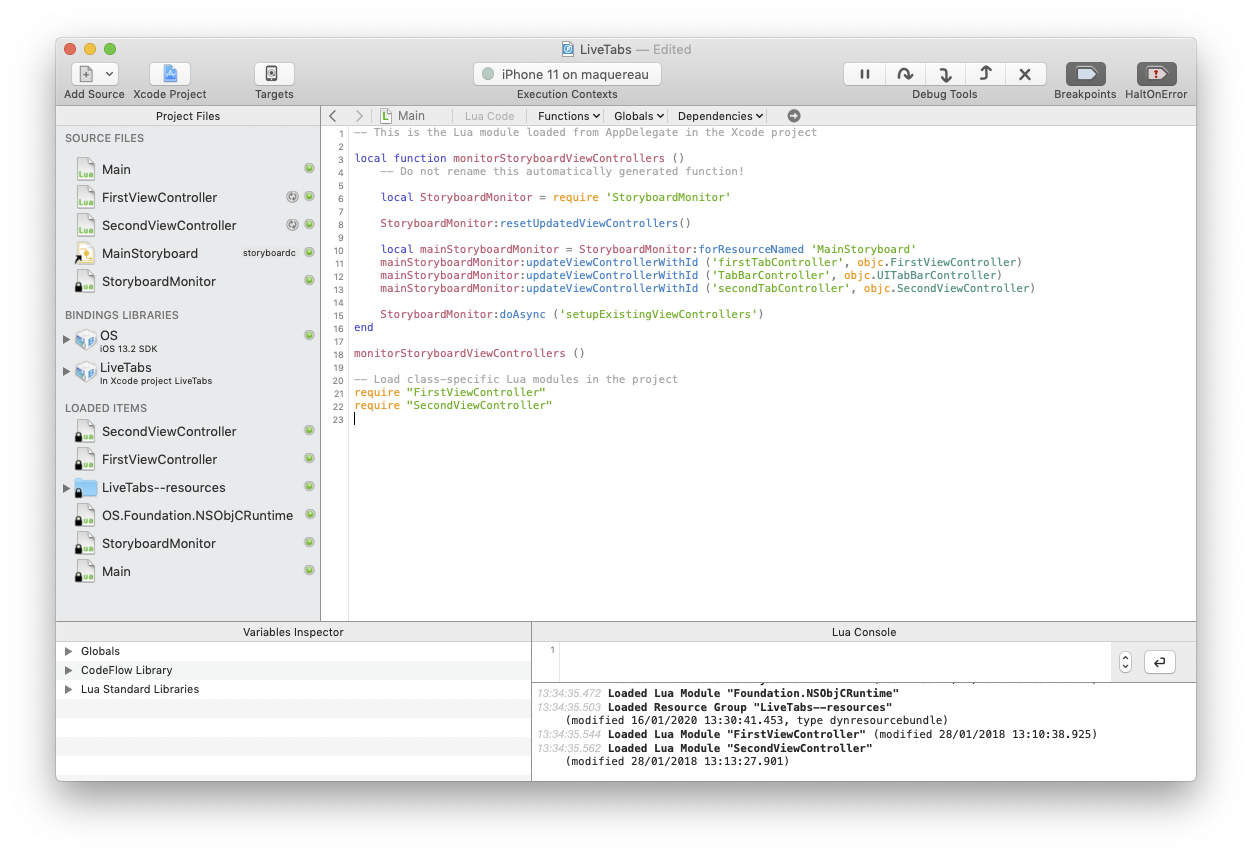
The Execution Contexts section in the toolbar shows a connected target application: an iPhone 11 simulator running on a machine named "maquereau". The LOADED ITEMS section in the files list contains the Lua code files and resources loaded in this execution context, and an execution control area is now displayed at the project window bottom, including a variable inspector and a Lua console for the connected target execution context.
Edit the storyboard
You can now start to edit Main.storyboard in Xcode and watch the running target application change on the fly in the simulator.
Select the Second tab in the running target application (in the simulator). Then in Xcode, change the background color of the Second ViewController's view to orange and the text color of the Second View label to white.
Save the storyboard (
cmd-S) in Xcode, and a few seconds later, the target application gets updated with the new storyboard content.In the following steps of this tutorial, saving the storyboard in Xcode will be implicit, but saving is nevertheless highly recommended to speed up storyboard changes propagation in the running target application!
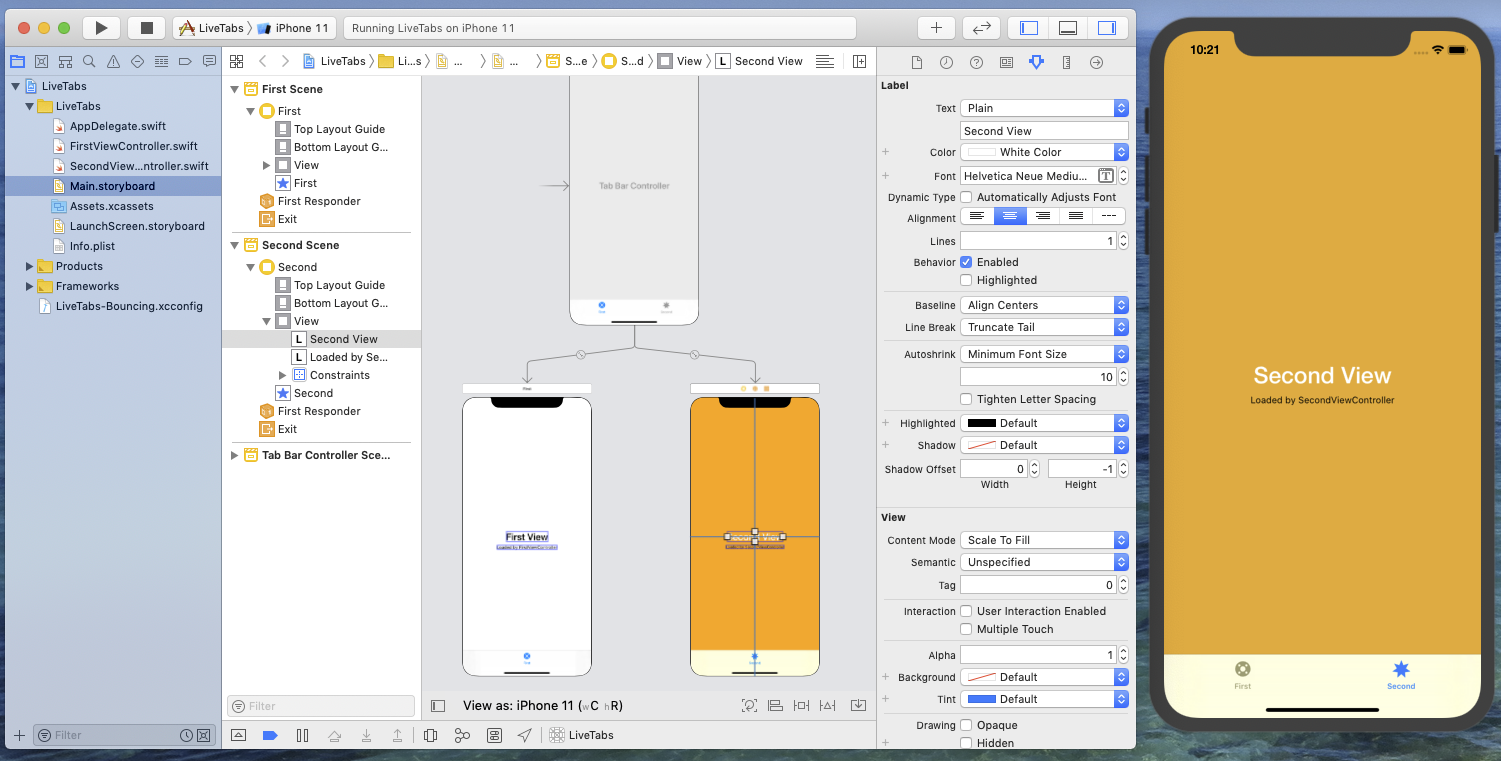
Notice that the target application still shows the Second tab: this means that the selected-tab state of the
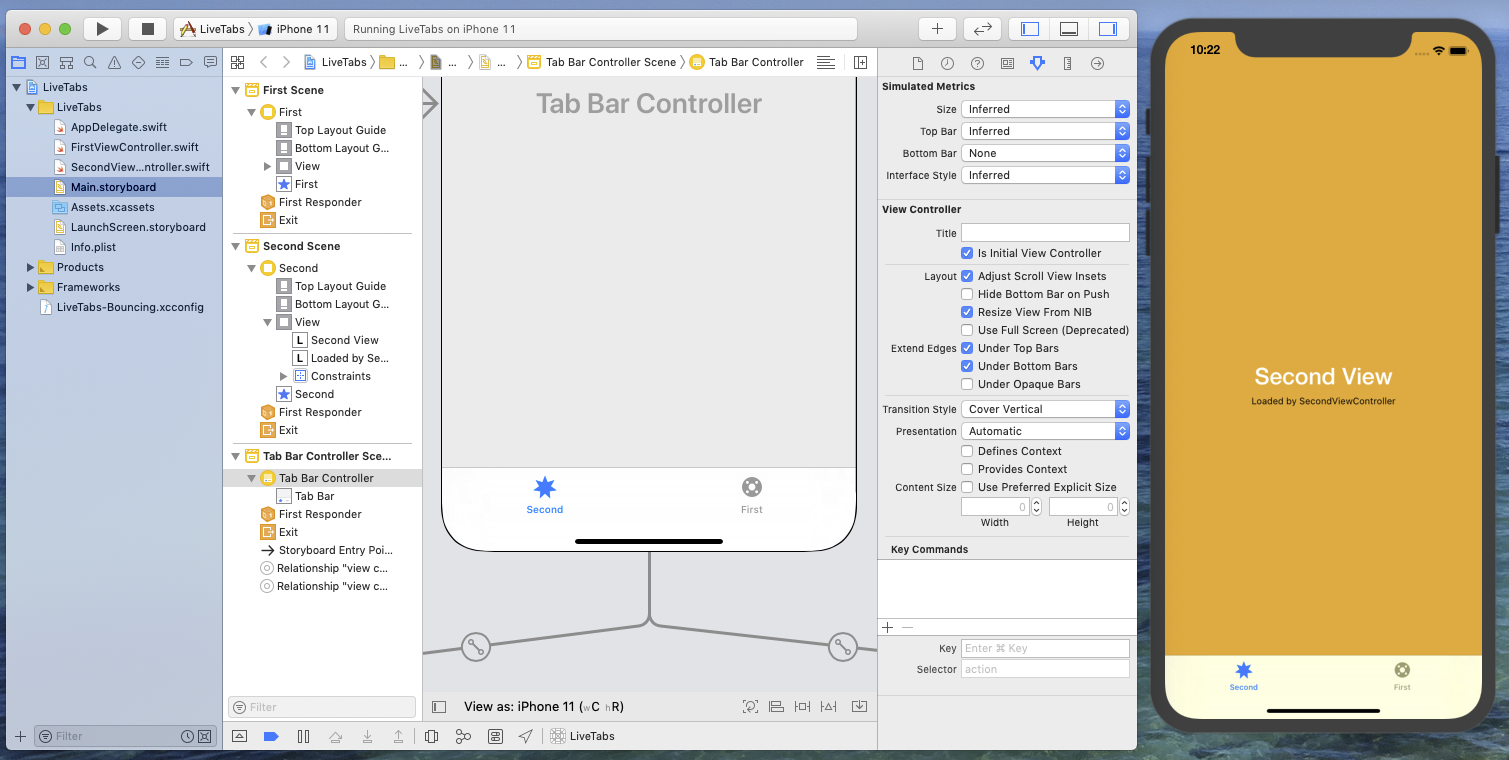
UITabBarControllerhas be preserved during storyboard update.In Xcode, reorder the tabs in the Tab Bar Controller scene, by dragging the Second tab to the leftmost position and save the storyboard. In the simulator, the target application shows the changed tabs order.
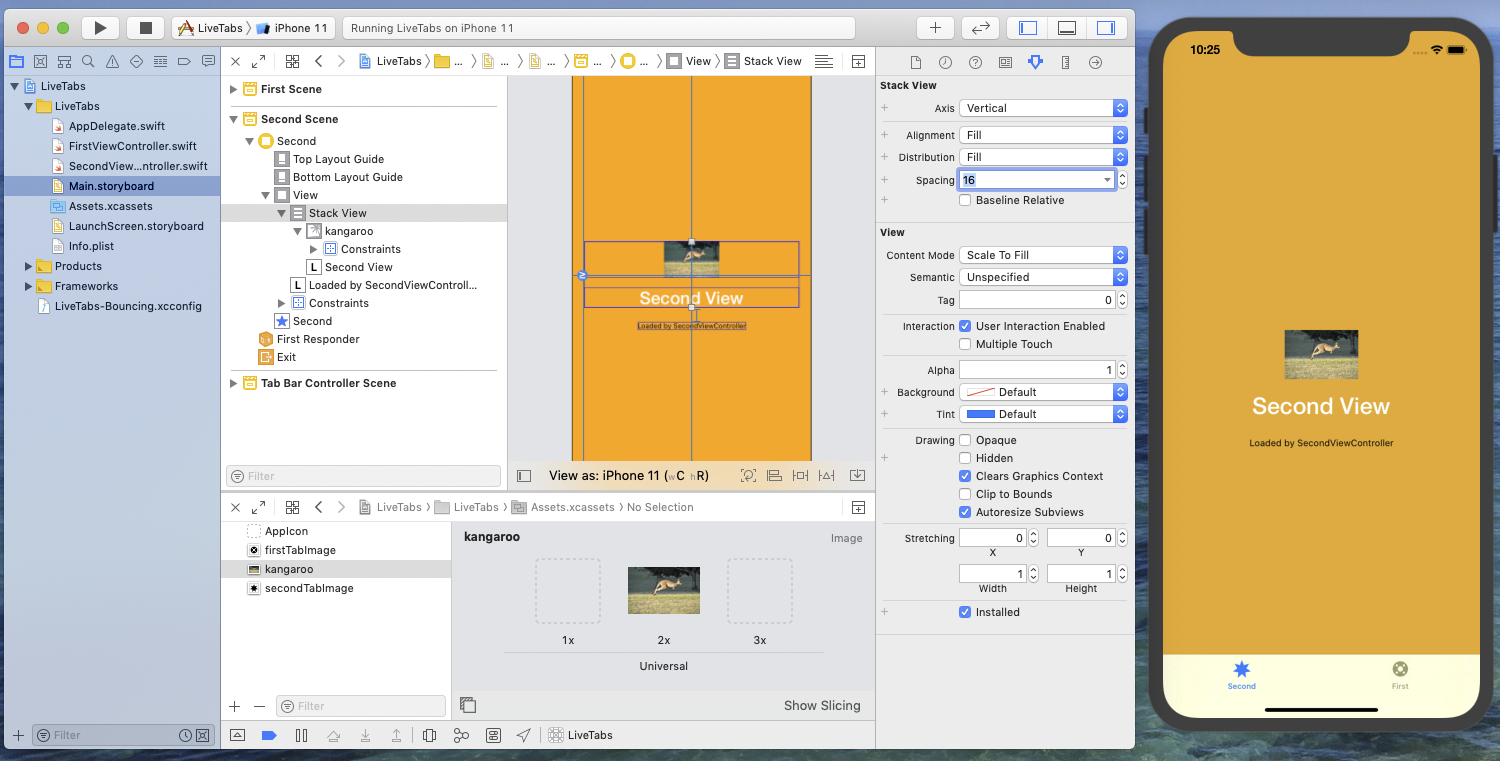
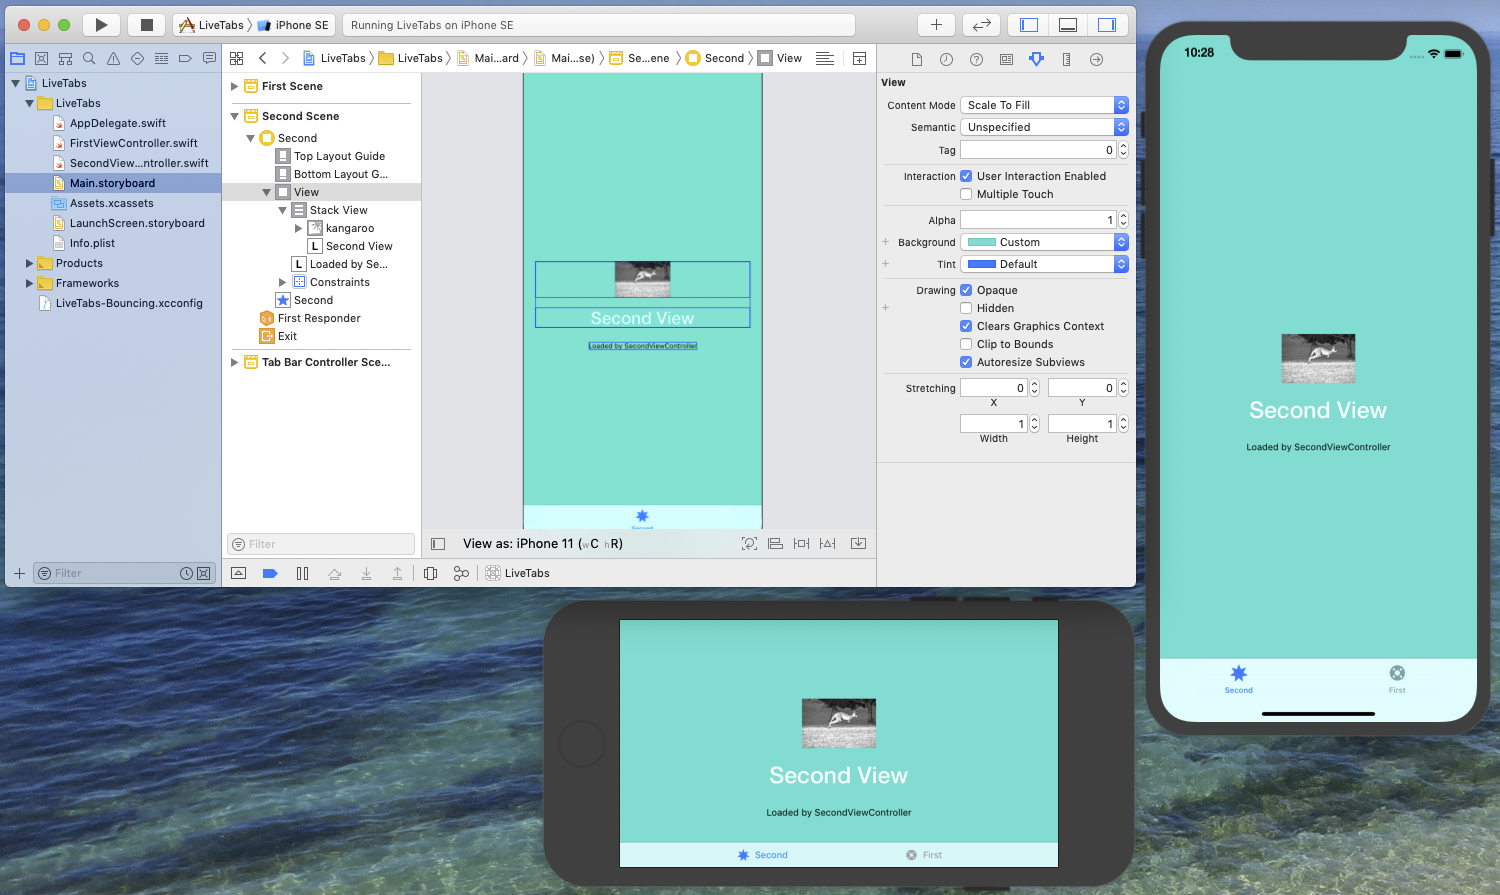
Now you will add an image view near the Second View label.
Embed the Second View label in a Stack View, then add layout constraints to make this StackView centered in its parent view and correctly aligned with the small black Loaded by… label. If some inconsistency occurs with the layout constraints, you may experience unexpected positioning of both labels in the target application in the simulator. In such case, fixing the constraints with bring everything back at the right position.
Insert an Image View in the Stack View and specify a fixed height constraint of 64pts. The result should look like this:

Notice how the SecondView labels have been shifted down by the currently-empty Image View.
Use dynamic image assets
In this step, we will add an image to the assets catalog in the Xcode project, reference this image in the storyboard, and then modify the image. As expected the target application in the simulator will reflect these changes as they occur.
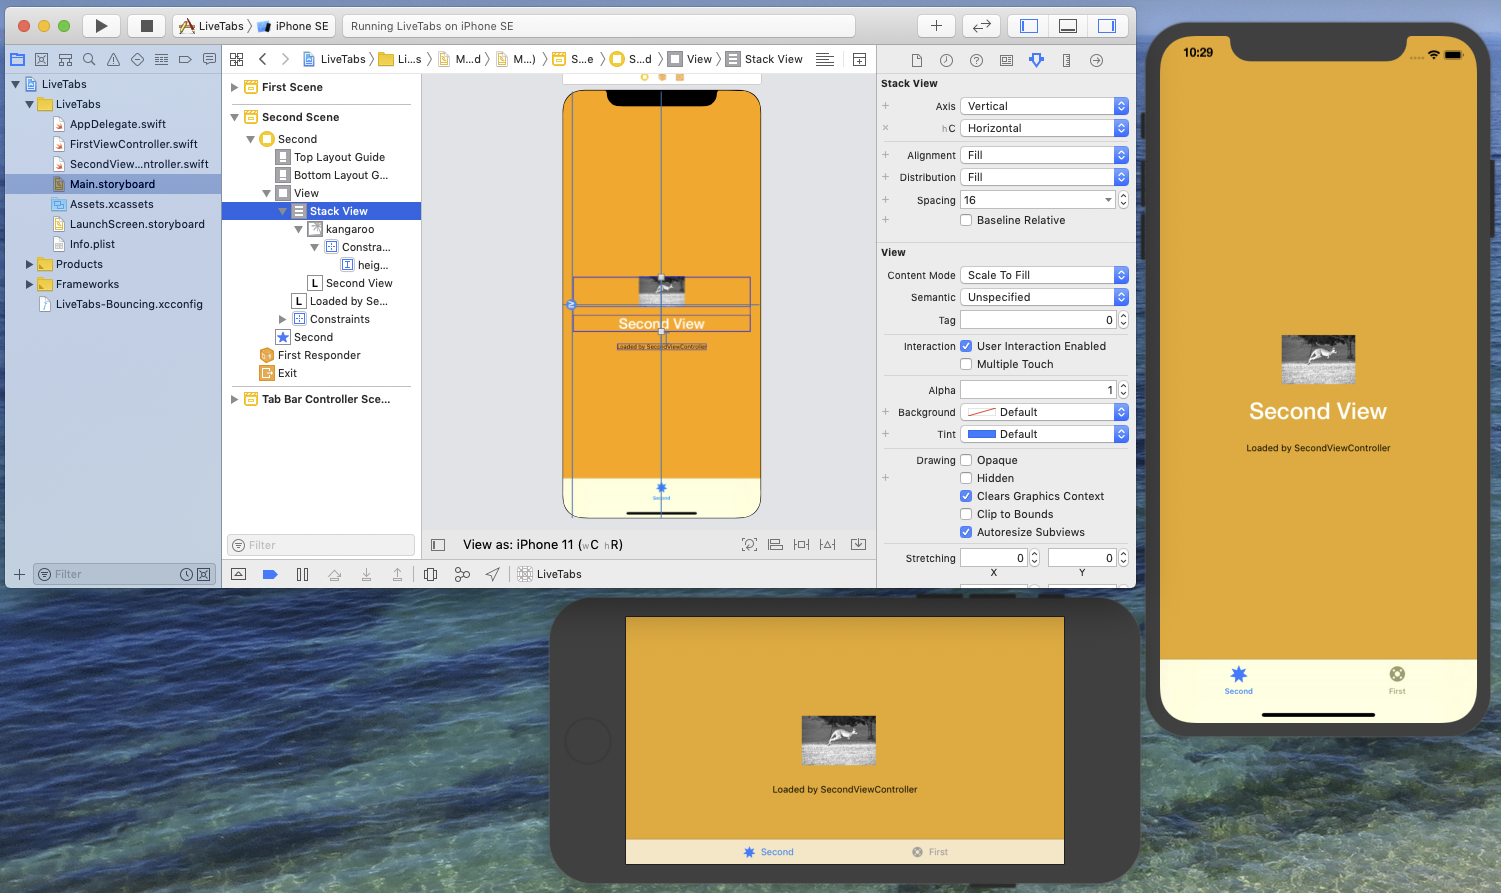
Add an image to the LiveTabs app's asset catalog in Xcode (here a kangaroo photo) and set the Image View's image in the Second View Controller to this asset. The image appears in the running target application.
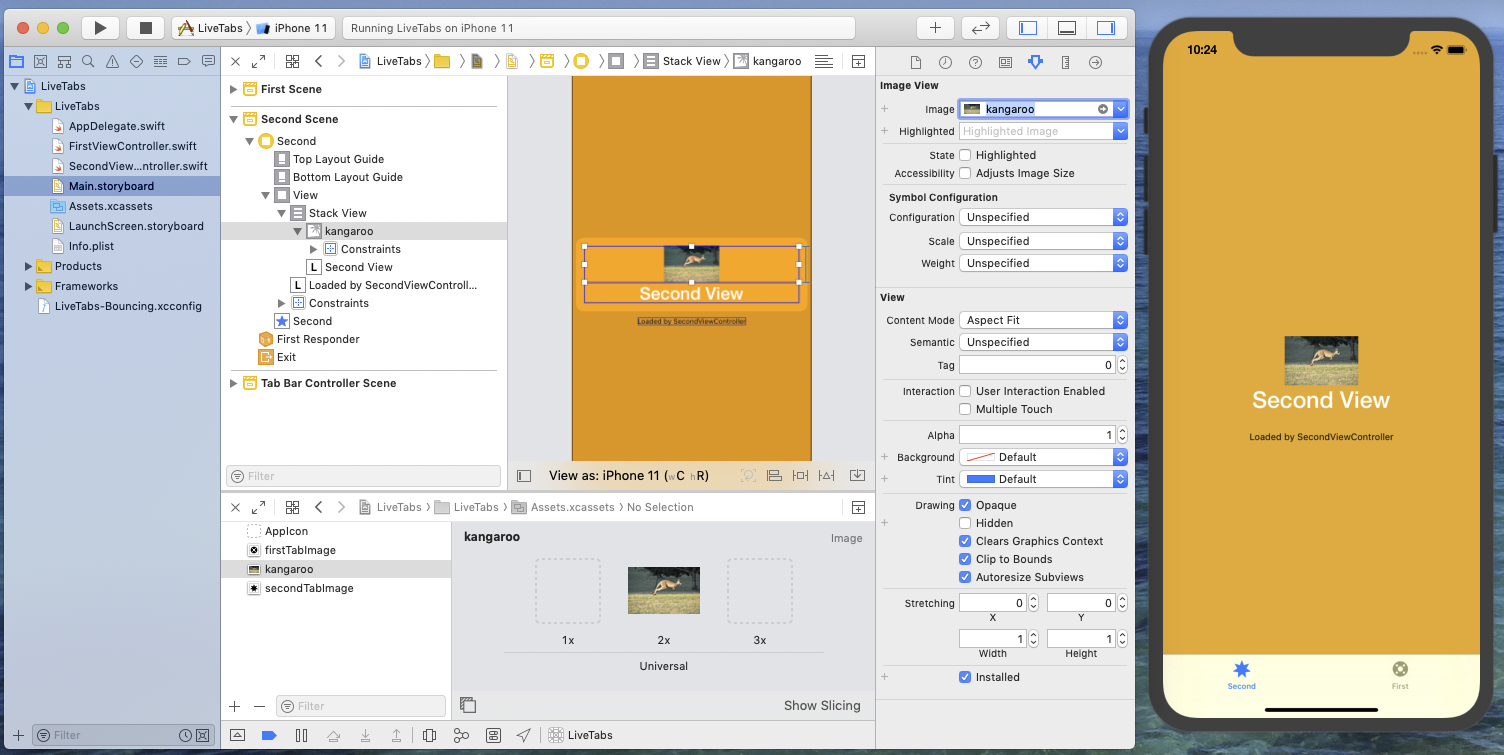
In the Stack View, the image and label appear a little too close. Adjust the Stack View Spacing to improve this.
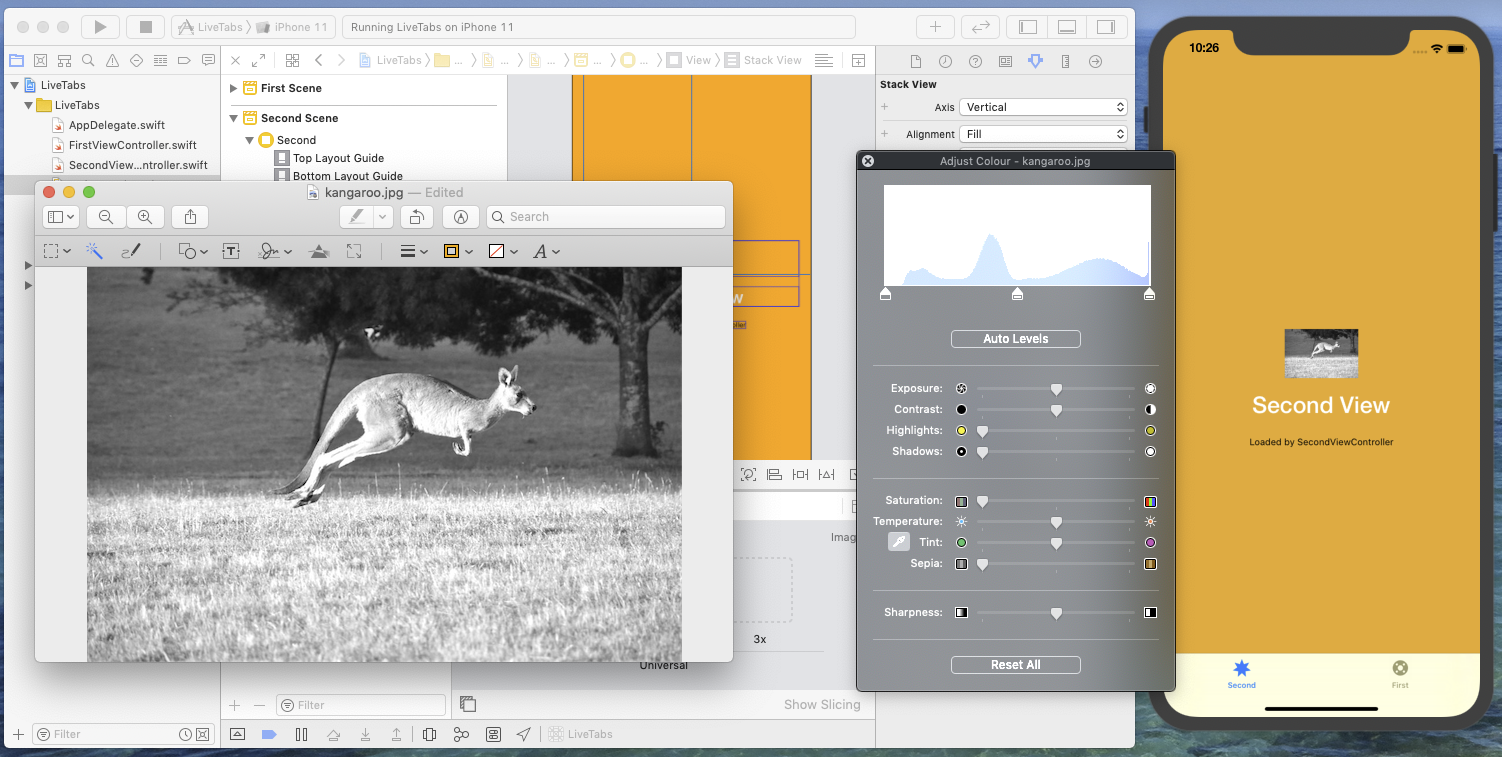
In the asset catalog editor in Xcode, edit the kangaroo image with an external editor, using the contextual menu. This will open the Preview application by default. In Preview, make the kangaroo image black and white by reducing the saturation to zero, and save the image. The running target application gets automatically updated.
Update on multiple devices
A common pitfall of designing with layout constraints comes from the variety of device screen or window sizes your app has to support. A set of constraints may look fine in a given test situation but present unexpected views position or spacing in others.
In this section, we will see how running multiple occurrences of the target application simultaneously may be a significant help to detect and quickly fix such constraint-related issues.
From Xcode, run the target application on a second device, for example on an iPhone SE simulator. If this makes Xcode stop the currently running application instance (in the iPhone 11 simulator), simply tap on the LiveTabs app icon in the corresponding simulated device to restart it.
So now, two instances of the target application are running. Rotate the iPhone SE simulator to put it in landscape mode, so that you can test how the app design behave in a compact vertical size class.
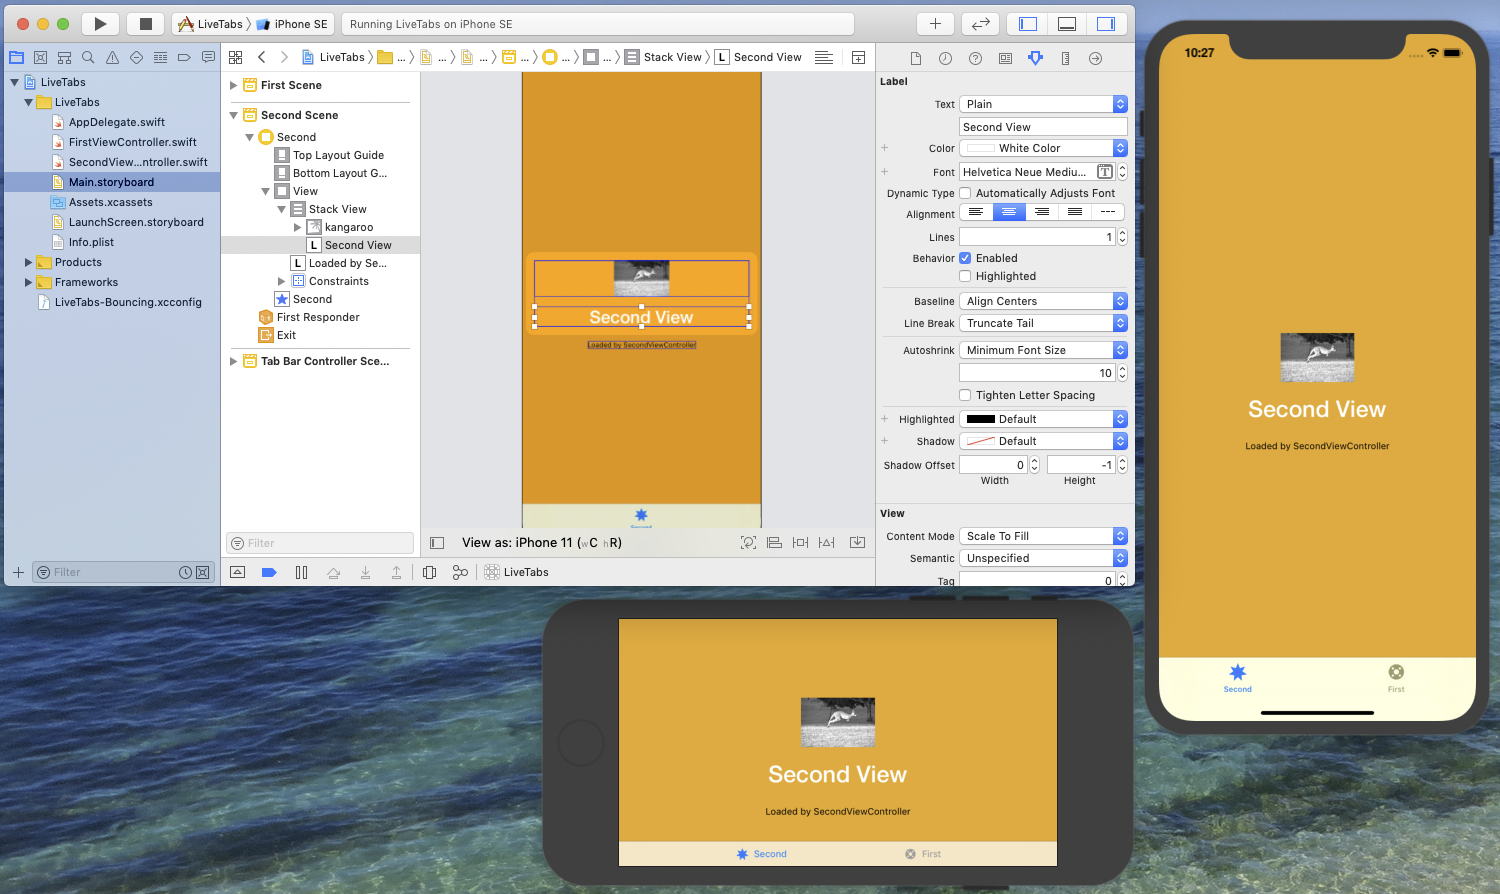
In Bounces, the LiveTabs project window now shows two connected target execution contexts: an iPhone 11 simulator and an iPhone SE simulator.
Try changing the Second view background color in the storyboard. Both running target application instances get updated.
Now cancel the change in the storyboard (
cmd-Z) to revert to the orange background color in the Second view.Let's assume that the target app design specifies that on iPhones in landscape mode, the image shall be horizontally aligned left to the Second View label. To achieve this, in the Stack View properties, add a Variation of the Axis property for (Width: any, Height: compact) and set its value to Horizontal.
After this change, you notice that the Second View label is not visible anymore on the iPhone SE simulator. This reveals a problem in the Stack View layout and we have to fix it.
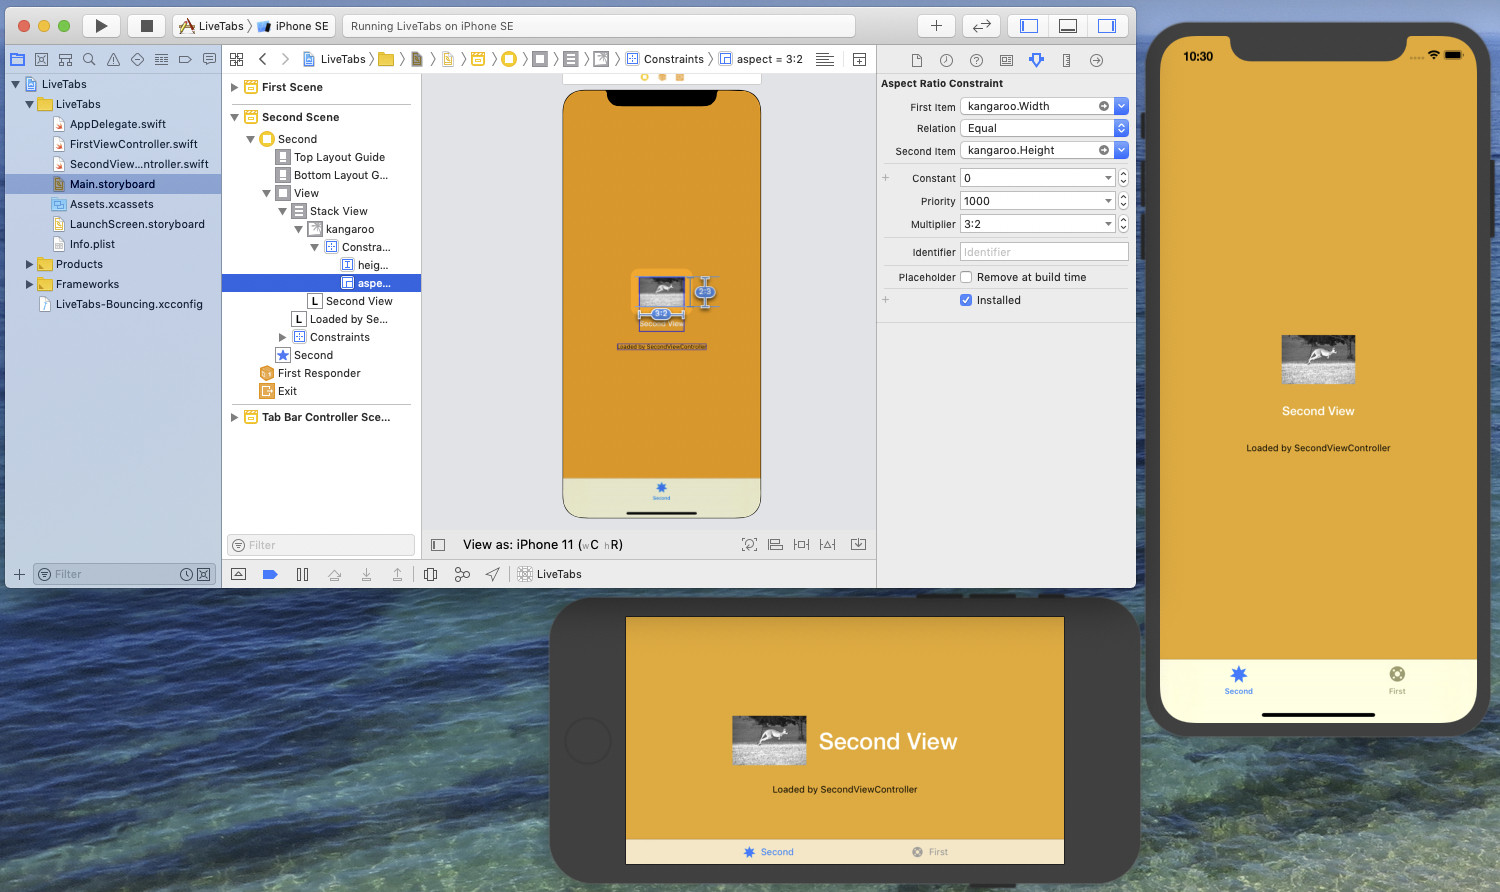
After debugging the app view layout with Xcode, you realize that the problem is caused by the width of the kangaroo image view, which is much larger than the visible scaled image, and that adding a layout constraint to specify this image view width would certainly help.
Add an aspect ratio constraint to the kangaroo image view and set the aspect ratio to 3:2. Both simulator get updated and the target app now looks like:
The horizontal Stack View on the iPhone SE simulator now looks as expected, but the Second View label size on the iPhone 11 simulator is now unexpectedly small.
This unwanted side-effect is caused by the Stack View Alignment parameter, set to Fill by default. Set this parameter to Center to allow Stack View elements to keep their natural width in case of vertical axis(or height in case of horizontal axis).
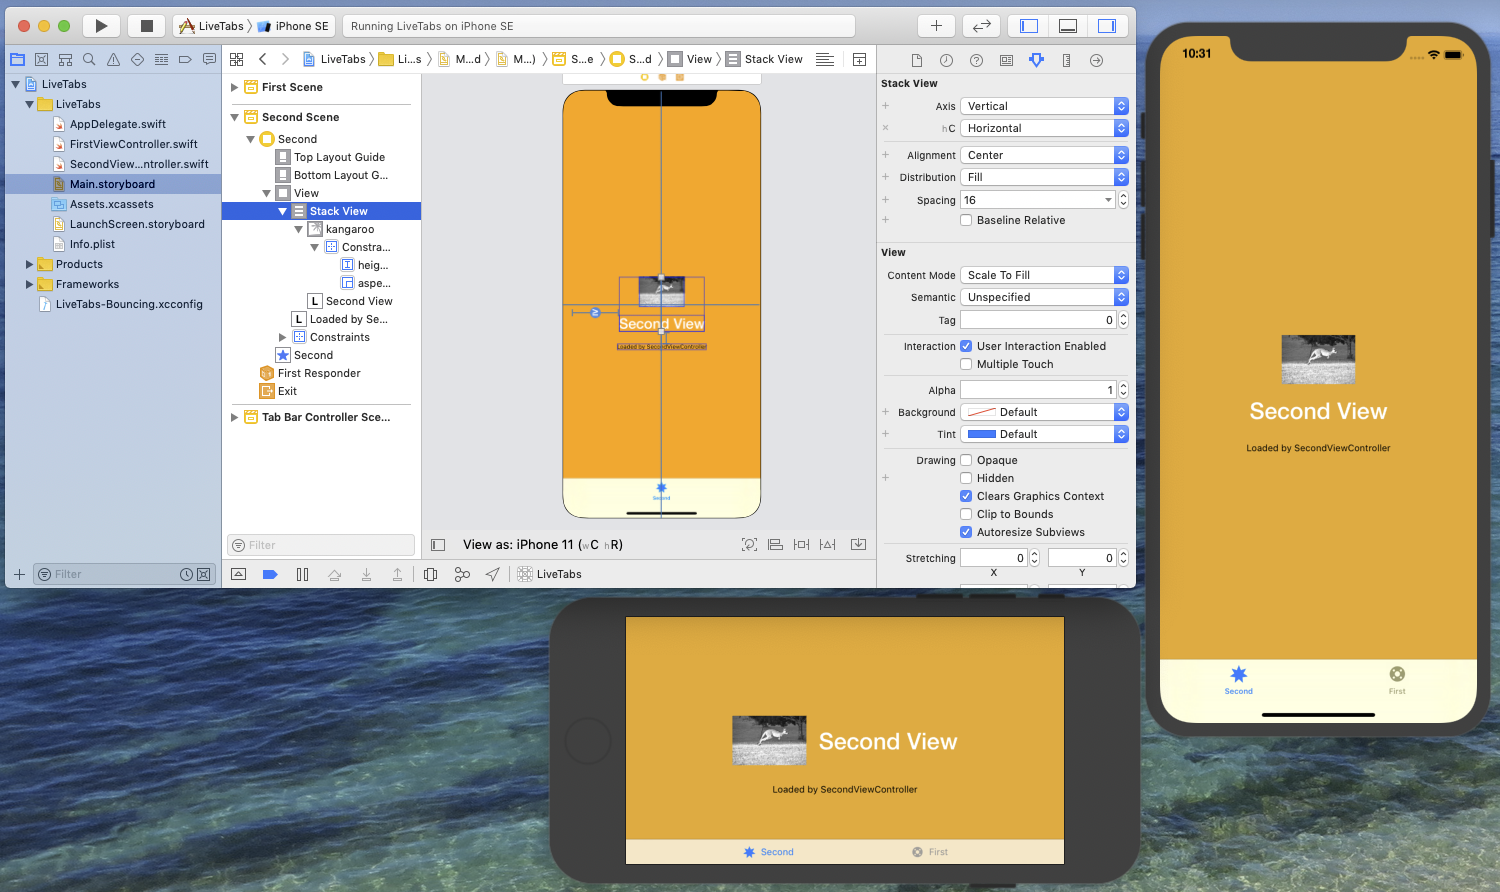
This is better. The target app now looks as expected for both portrait orientation (regular height) and landscape orientation (compact height).
However you might wonder if the layout would look more balanced with a bigger image in portrait orientation. You can test your idea immediately by adding a variation of the image height constraint for compact height size classes and by setting the contraint's constant to 128 for non-compact height.
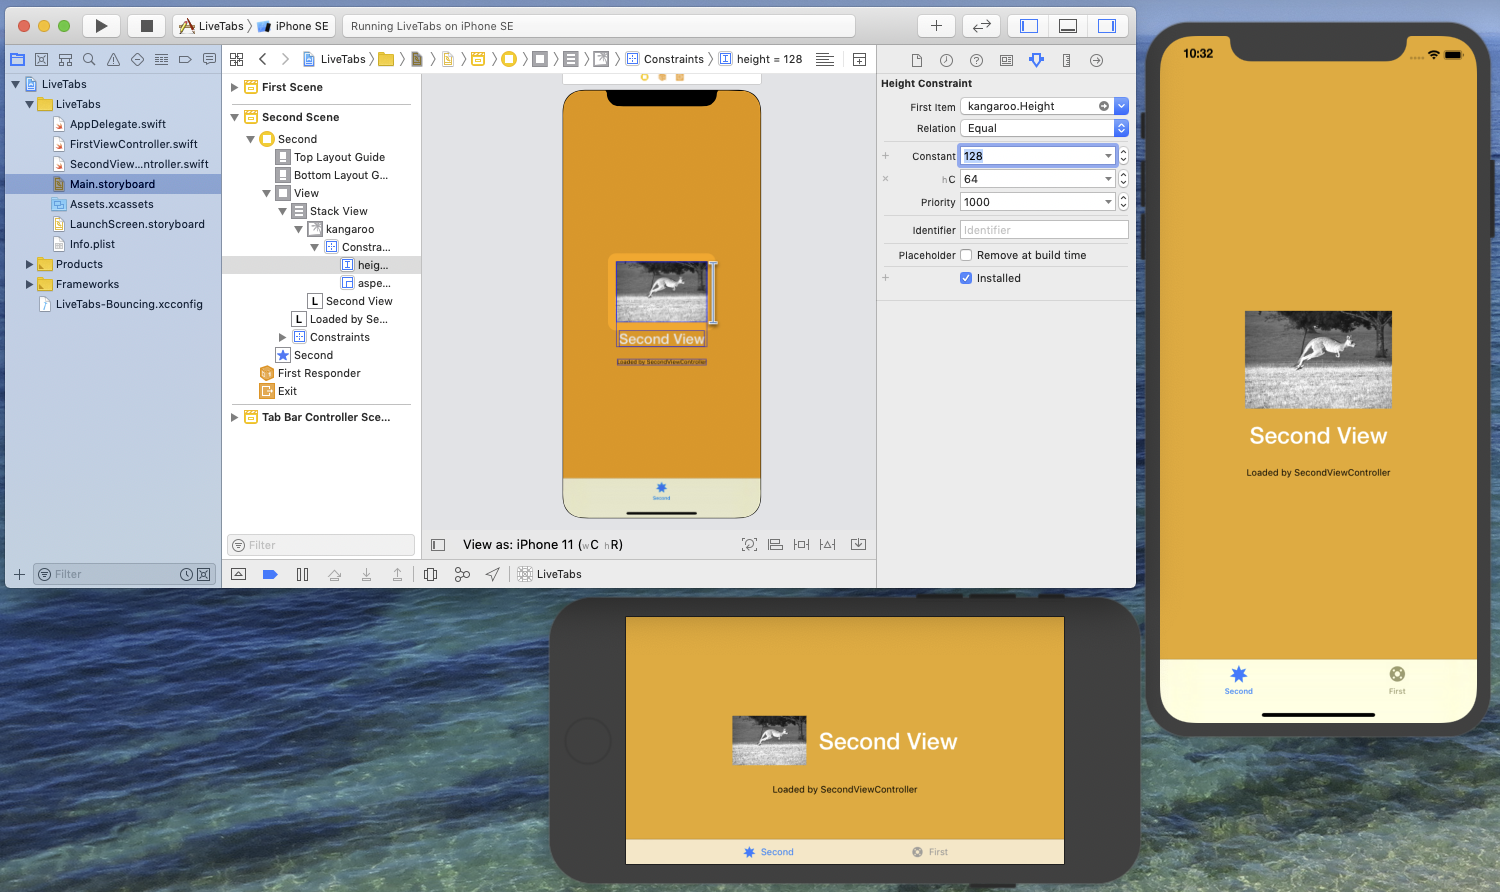
Simply check how it looks, and eventually cancel the change it you're not satisfied with it.
Work with localizations
App and storyboard localization can be a time-consuming activity, for example when you realize that some of the provided translations for a given language do not fit in the space specified by the target app design.
Interactive visualization of localized strings and assets in the target application can help speeding up this process. To illustrate this point, let's add a new language to our LiveTabs project.
Select the Xcode project file and add a French localization to the project. In the dialog asking which files to localize, be sure to specify the Main storyboard.
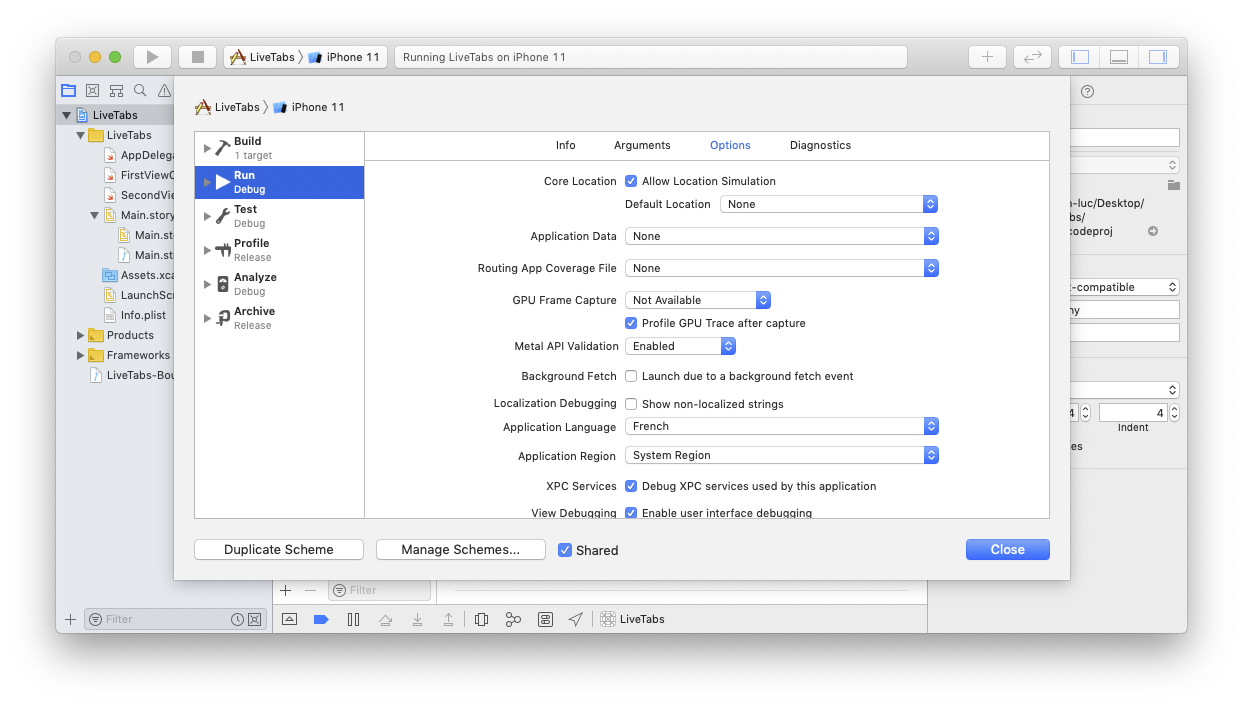
Edit the LiveTabs Scheme in Xcode and set the Application Language to French in the Options tab.
Run the app again on the iPhone 11 simulator.
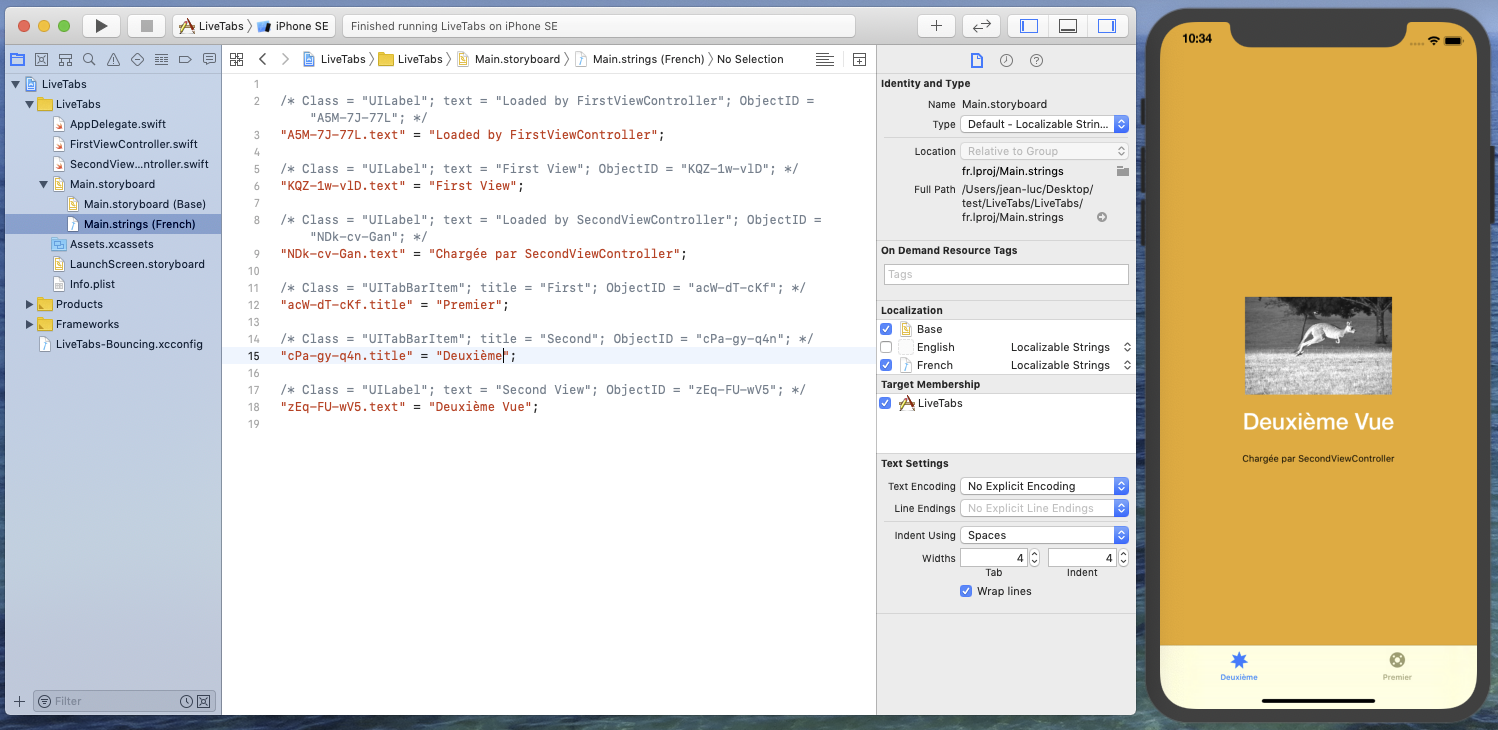
In the Main storyboard strings file for the French localization, change the translation for the Second View label and save the strings file. The updated localization immediately appears in the running target application.
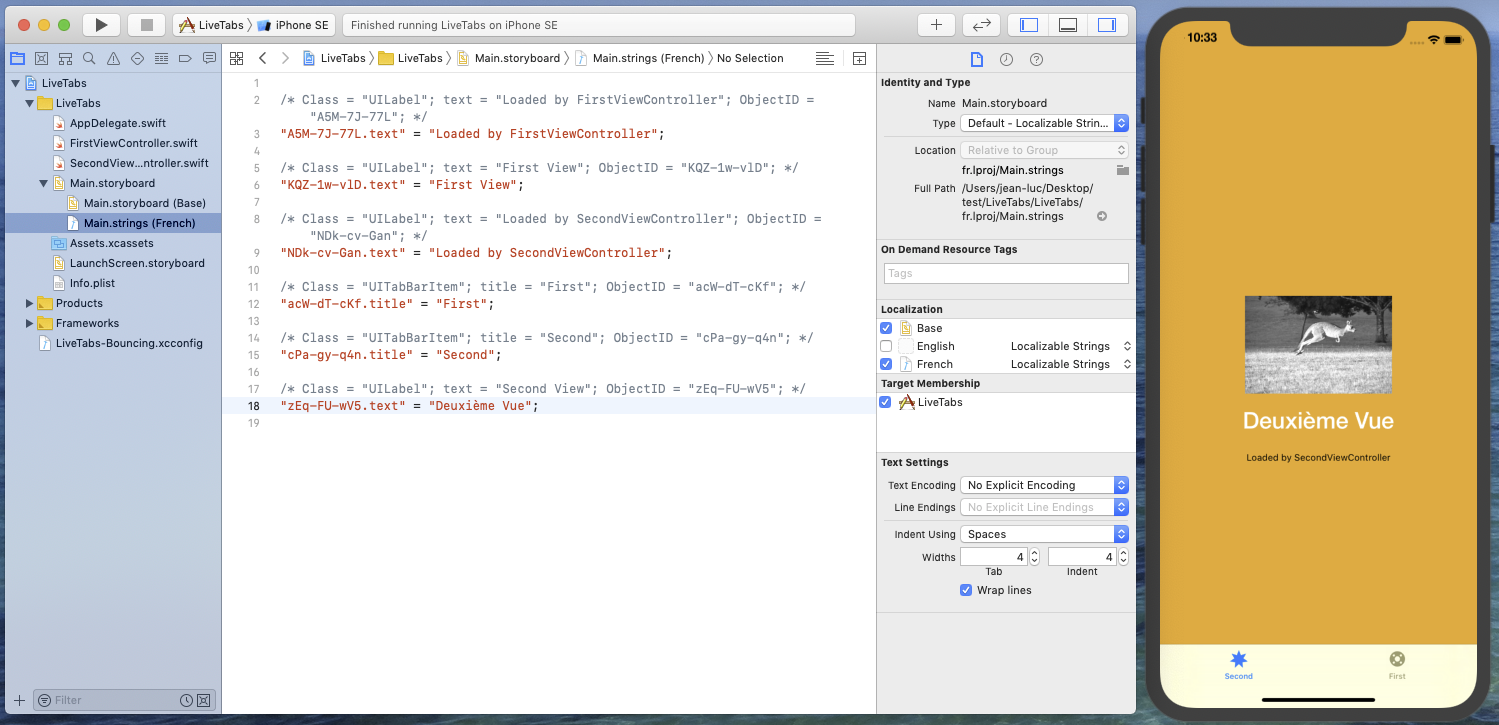
In the Main storyboard strings file, set other translations visible in the second View Controller, and save.
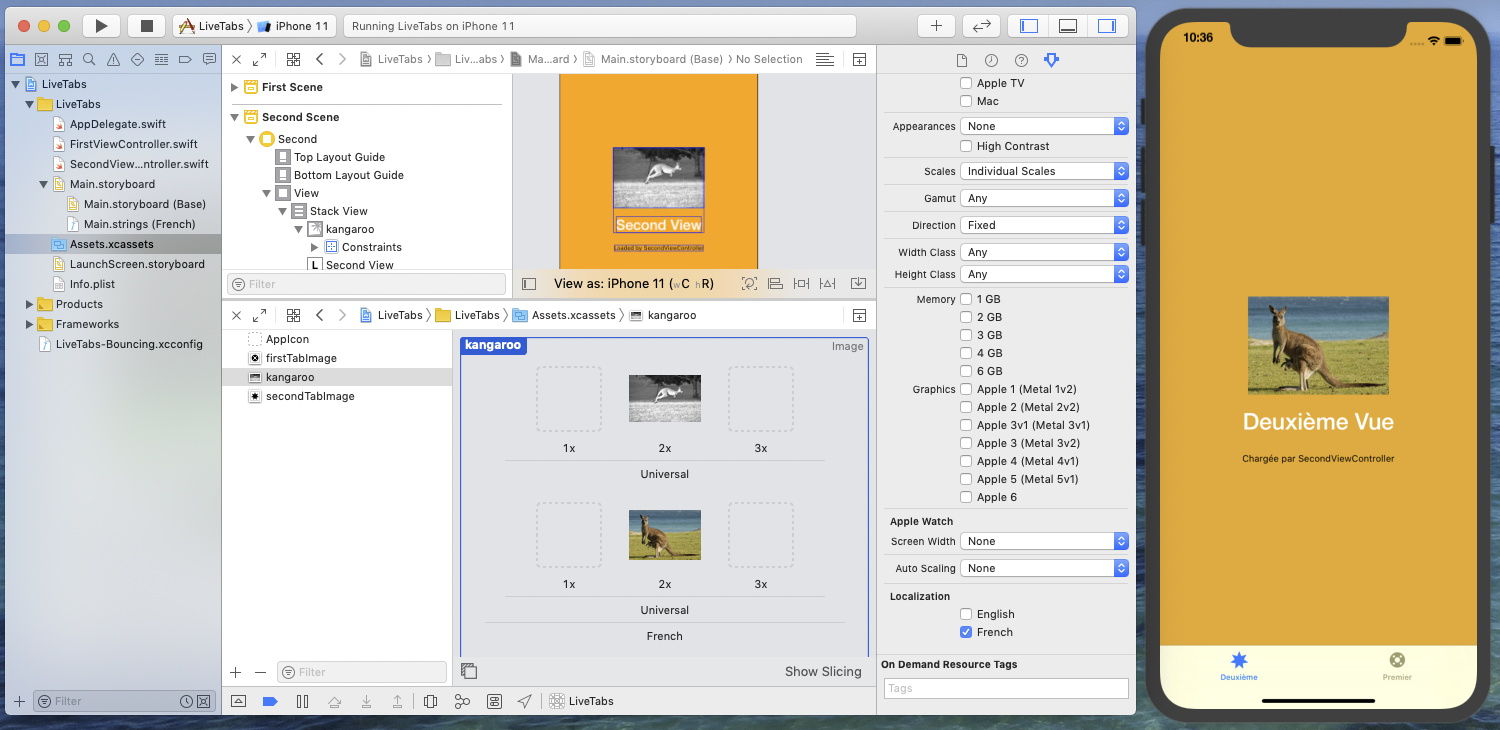
Now suppose that the kangaroo image has to be localized too. In the project's assets catalog, add a French localization to the kangaroo image asset.
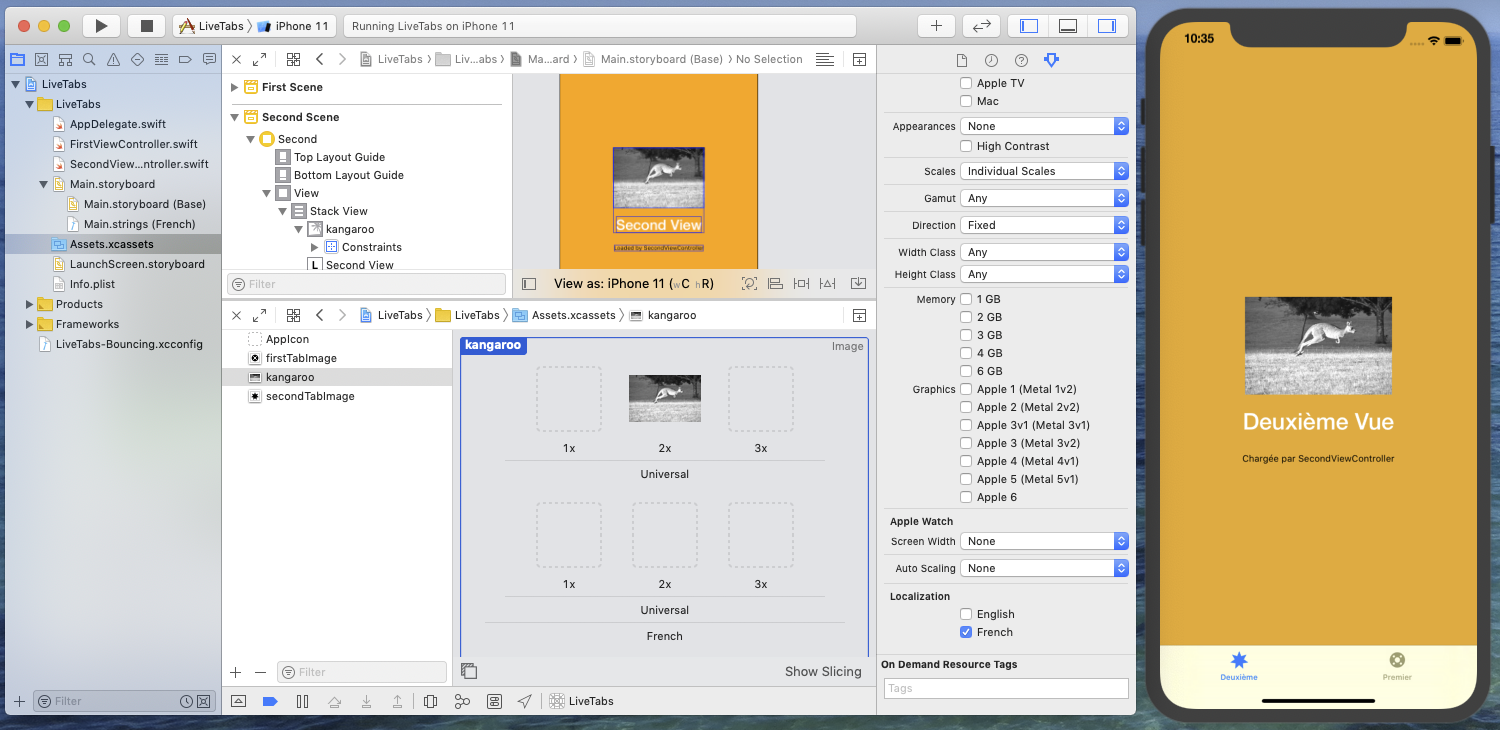
Drag the localized kangaroo image in the placeholder for the French localization and save the assets catalog. The localized image variant gets displayed in the running target application.
Note: as localizing assets catalog is only supported on iOS 13+, if your application targets iOS 12 or below, you can use separate resource images and localize them individually in Xcode. Dynamic update and localization of resource images referenced by storyboards is also supported by Bounces.
Next steps
Tanks for reading this tutorial. You should now have a better idea of what dynamic storyboard update in Bounces does, and how you can use it to speed up your app interface design and fine-tuning.
However the sample app here was really basic, and you might wonder how you can make Bounces dynamic storyboard update work with an existing real-size app with a larger storyboard.
To learn more about this, we recommend you to read our Storyboard Updates in Depths tutorial series, starting with Part 1 - App Configuration and First Dynamic Edits.
Post a Comment